A headboard isn’t just furniture, it’s the anchor of your bedroom. Whether you’re trying to mask wall damage, add sound dampening behind your pillow wall, or create a focal point in an otherwise plain room, the right headboard makes a functional and visual difference. This guide walks through budget-friendly DIY builds, upholstered options, rustic wood designs, sleek modern frames, and bold statement pieces that work for different skill levels and design preferences. No filler, no Pinterest daydreams, just practical ideas you can actually execute.
Table of Contents
ToggleKey Takeaways
- Bedroom headboard ideas range from budget-friendly painted accent walls ($20) to custom upholstered designs ($500), with options for every skill level and design preference.
- A quality headboard protects walls from oil, scuffs, and dirt while providing back support, sound dampening, and visual balance to anchor your bed as the room’s focal point.
- DIY headboard builds like reclaimed pallet boards ($40), fabric-covered plywood ($50-80), and floating wood ledges (under 2 hours) offer practical, cost-effective alternatives to store-bought frames.
- Upholstered headboards with channel-tufting, wingback designs, or velvet slip-covers add a tailored, hotel-style aesthetic and can be easily swapped or updated seasonally.
- Wood and rustic headboard options—barn doors, live-edge slabs, and shiplap panels—bring farmhouse or industrial character while requiring intermediate to advanced carpentry skills and proper wall fastening.
- Advanced statement headboards using mirrored glass, floor-to-ceiling upholstery, or integrated LED lighting transform your bedroom into a designer space but demand careful planning, secure mounting to studs, and sometimes professional installation.
Why Your Headboard Choice Matters More Than You Think
A headboard protects your wall from oil, scuffs, and the slow accumulation of dirt transferred from pillows and hair. Without one, painted drywall shows wear within months, especially behind memory foam or pillows that compress against the surface.
From a comfort perspective, headboards provide back support for reading or watching TV in bed. Upholstered versions double as sound dampeners, useful in shared walls or rooms with hard flooring that echoes.
Visually, a headboard frames the bed and gives the room a finished look. It balances tall windows or vaulted ceilings and anchors the largest piece of furniture in the space. Even a simple wood frame changes the room’s proportions.
Structurally, headboards can serve as mounting surfaces for reading lights, shelves, or outlets if you’re building custom. This is where planning your layout before committing to materials pays off, retrofit is possible but messier.
Budget-Friendly DIY Headboard Ideas
Reclaimed Wood Pallet Board
Source heat-treated (HT stamped) pallets from shipping yards or hardware stores, avoid chemically treated (MB) pallets. Sand them down with 80-grit, then 120-grit paper to remove splinters and dirt. Arrange vertically or horizontally, secure with wood glue and 1¼-inch finish nails into a backing frame of 1×4 pine. Seal with polyurethane or leave raw for a weathered look. This build takes 3–4 hours and costs under $40 if you source pallets free.
Fabric-Covered Plywood Panel
Cut ¾-inch plywood to your bed width (standard queen is 60 inches). Wrap with 1-inch foam padding (sold by the yard at fabric stores), then stretch canvas drop cloth, linen, or upholstery fabric over the front and staple to the back with a heavy-duty staple gun (Arrow T50 or similar). Mount to the wall with French cleats or Z-bars for easy removal. Total cost runs $50–$80 depending on fabric choice. Many ideas for decorating incorporate this technique for a cohesive bedroom refresh.
Painted Accent Wall Headboard
Skip the physical structure entirely. Use painter’s tape to outline a headboard shape directly on the wall, arched, rectangular, or geometric. Paint with interior latex in satin or eggshell finish (one quart covers roughly 100 square feet). This works well in rentals where drilling is restricted. It’s reversible, costs under $20, and takes an afternoon including dry time.
Upholstered and Fabric Headboard Styles
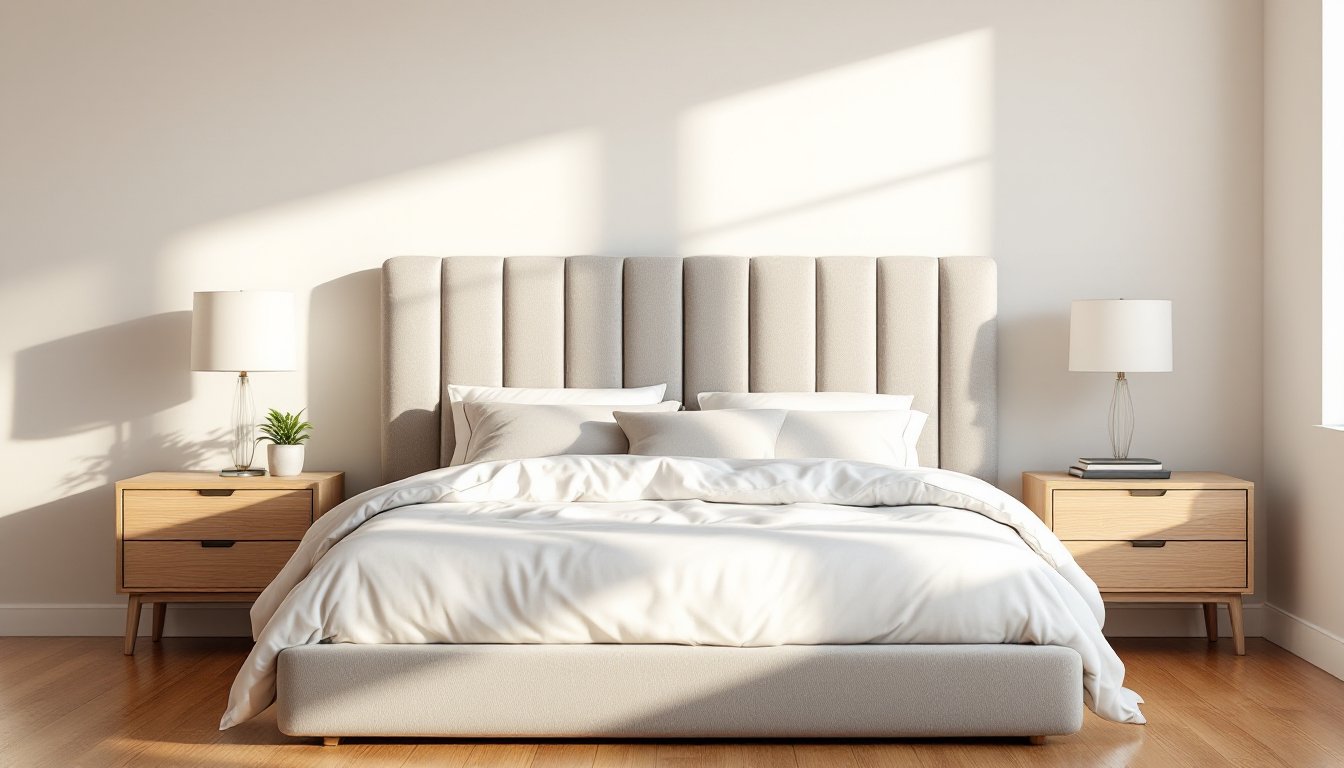
Channel-tufted panels offer a tailored, hotel-style look. Build a plywood base, mark vertical channels every 8–10 inches, and staple fabric between foam-padded slats. Use upholstery batting (Dacron polyester) under the fabric to smooth out edges. This is an intermediate build, budget 6–8 hours for a queen-size frame.
Wingback headboards add height and side wings for a classic silhouette. These require more advanced carpentry: a central panel plus angled side frames joined with pocket screws and braced with corner brackets. Upholster after assembly. If cutting compound angles intimidates you, buy a pre-cut MDF kit from woodworking suppliers and focus on the fabric work.
Velvet or linen slip-covered headboards attach to store-bought frames via hook-and-loop tape. You can swap covers seasonally without tools. Choose mid-weight upholstery linen (10–12 oz) for durability or polyester velvet for a softer feel and stain resistance. Many interior design portfolios feature these styles in neutral and jewel tones for adaptable bedroom palettes.
Safety note: When stapling fabric, wear safety glasses. Staples can ricochet off hardwood or particle board backing.
Wood and Rustic Headboard Designs
Barn door headboards use rough-sawn or reclaimed lumber arranged in vertical planks with Z-brace backing. Cut 1×6 or 1×8 pine boards to height (48–54 inches is standard), lay face-down, and attach horizontal 1×4 braces with construction adhesive and 2-inch wood screws. Add black strap hinges for visual detail even if the door doesn’t move. Finish with dark walnut or weathered oak stain. This design suits farmhouse or industrial aesthetics and costs $60–$100 in materials.
Live-edge slab headboards showcase natural wood grain. Source slabs from local sawmills, expect to pay $3–$7 per board foot for walnut or maple. Stabilize the slab with a coat of penetrating epoxy resin on the cut ends to prevent checking (cracking along the grain). Mount with heavy-duty L-brackets into wall studs, live-edge slabs are heavier than dimensional lumber. This is a statement piece and requires intermediate woodworking skills, especially if you need to flatten the slab with a hand planer or router sled.
Shiplap panel headboards echo modern farmhouse trends. Install ½-inch primed pine shiplap directly to the wall behind the bed using a finish nailer and 18-gauge nails into studs. Paint in contrasting or matching wall color. If the wall isn’t load-bearing, you can skip studs and use panel adhesive, but structural walls require fasteners. Many builders reference design trends for current shiplap color pairings and layout options.
Modern and Minimalist Headboard Options
Floating wood ledge headboards are clean-lined and functional. Mount a 2×10 or 2×12 board horizontally at mattress height using concealed floating shelf brackets rated for at least 50 lbs. The top surface works as a narrow shelf for a phone, book, or small plant. Finish with satin polyurethane or leave raw if using hardwood like white oak. This takes under 2 hours and costs $30–$60.
Metal frame headboards suit industrial or Scandinavian interiors. Weld or bolt together ½-inch steel square tubing or use pre-fabricated iron bed frames from restoration hardware suppliers. If welding isn’t an option, connect sections with flanged pipe fittings (similar to black iron plumbing pipe). Finish with matte black spray enamel or leave raw steel and seal with clear lacquer to prevent rust. Cutting metal requires a miter saw with a metal-cutting blade or an angle grinder, both produce sparks, so wear a full-face shield and leather gloves.
Cane or rattan panel headboards bring texture without bulk. Purchase pre-woven cane webbing (sold in rolls) and frame it with 1×2 trim boards mitered at the corners. Attach the webbing with small wire brads or a staple gun, stretching lightly to avoid sagging. This style appears frequently in contemporary home features and works well in smaller bedrooms where heavy wood feels cramped.
Statement Headboards for Bold Bedrooms
Floor-to-ceiling upholstered walls make the bed disappear into a fabric backdrop. Frame out a stud wall (non-load-bearing) with 2×4 lumber on 16-inch centers, sheath with ½-inch drywall, then pad and upholster the entire surface. This is advanced work, plan for electrical outlets and consider fire-rated batting if using foam thicker than 2 inches. Total material cost ranges from $200–$500 depending on room size and fabric.
Carved wood or MDF headboards add three-dimensional detail. Use a CNC router (available at makerspaces) or carve by hand with chisels and a Dremel rotary tool. Medium-density fiberboard (MDF) is easier to carve than hardwood and accepts paint well. Seal raw edges with wood filler to prevent moisture absorption. Prime with oil-based primer before painting to avoid grain raise.
Mirrored or glass panel headboards reflect light and open up tight spaces. Use ¼-inch tempered glass or acrylic mirror panels and mount with rosette mirror clips screwed into studs. Never rely on adhesive alone, glass is heavy and adhesive fails over time, especially in humid climates. Tempering is critical for safety: if the panel breaks, tempered glass shatters into small, less dangerous pieces. Hire a glass shop to cut custom sizes.
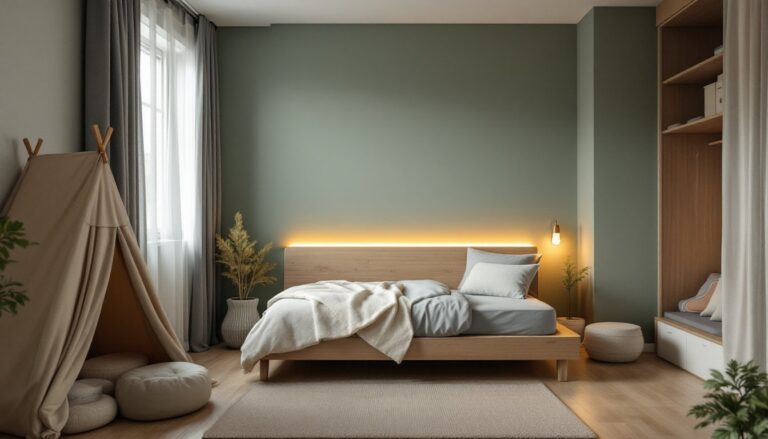
Headboards with integrated lighting combine form and function. Rout channels into the back of a wood headboard and run LED strip lighting (12V low-voltage) connected to a dimmer switch. Conceal wiring inside the headboard frame. If you’re not confident with electrical work, hire a licensed electrician, bedroom outlets are often on 15-amp circuits shared with other rooms, and improper wiring is a fire risk.
Conclusion
Headboards range from a $20 paint job to a $500 custom upholstery project, and both can look intentional if executed well. Pick a design that matches your skill level and your bedroom’s architecture, don’t force a floor-to-ceiling statement piece into a room with low ceilings. Measure twice, secure to studs, and don’t skip surface prep. Your bedroom will feel more finished, and your walls will thank you.