Mounting a TV in the bedroom isn’t just about drilling holes and running cables. The wall behind that screen becomes a focal point, one that can elevate the room’s design or turn it into a visual afterthought. Most people bolt up the bracket, tuck wires behind a plastic conduit, and call it done. But a well-designed TV wall balances function with aesthetics, integrating storage, hiding clutter, and creating depth without overwhelming a space meant for rest. Whether working with drywall, reclaimed wood, or built-in cabinetry, the right approach turns a black rectangle into part of the room’s architecture rather than an awkward add-on.
Table of Contents
ToggleKey Takeaways
- Bedroom TV wall ideas should balance function with aesthetics by integrating storage, hiding cables, and creating visual depth while maintaining a restful environment.
- Mount the TV at seated eye level (42 to 48 inches from the floor) and plan the entire layout before drilling to avoid conflicts with crown molding and ensure proper viewing angles.
- In-wall cable routing or neatly painted conduits outperform adhesive cable raceways, which yellow over time and leave residue on feature walls.
- Built-in entertainment centers (12 to 18 inches deep) seamlessly integrate TVs into bedroom architecture and provide functional storage for components and décor.
- Accent wall treatments like shiplap, wood slat paneling, and peel-and-stick tiles add texture and depth without major construction, while matte finishes prevent glare behind the screen.
- LED bias lighting behind the TV reduces eye strain and enhances ambiance when adjusted between warm (2700K) and cool (5000K) color temperatures at 10 to 20 percent brightness.
Why Your TV Wall Deserves Thoughtful Design
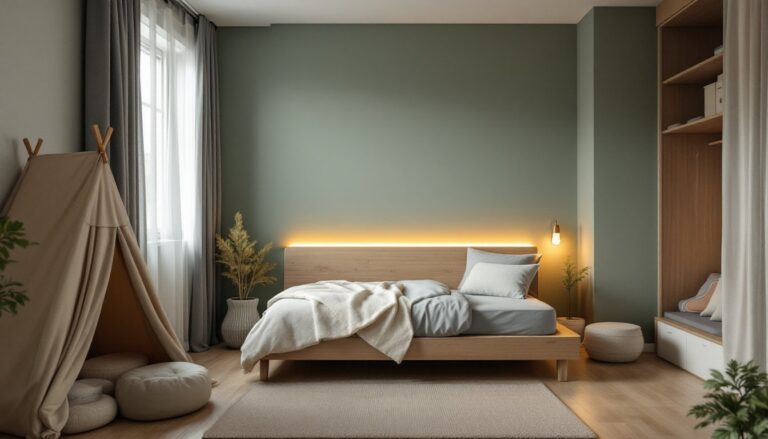
A bedroom TV sits at eye level from the bed, which means it’s one of the first things visible when entering the room and the last thing seen before sleep. Poor placement creates neck strain: sloppy cable management screams unfinished project: and a bare wall around the screen feels like a missed opportunity.
Thoughtful design addresses three practical concerns: viewing angle, cable concealment, and visual balance. The ideal mounting height places the center of the screen at seated eye level, typically 42 to 48 inches from the floor for most beds. This often conflicts with decorative elements like crown molding or wainscoting, so planning the layout before drilling is critical.
A well-executed TV wall also solves storage needs. Bedrooms rarely have excess space for media consoles, remotes, or streaming devices. Integrating shallow shelving, recessed niches, or floating cabinets keeps essentials accessible without cluttering nightstands. The wall becomes functional architecture rather than just a mounting surface.
Minimalist Floating TV Wall Setups
Floating the TV eliminates floor-level furniture and creates clean sightlines. This approach works best with articulating wall mounts rated for the TV’s weight (check VESA compatibility) and secured into wall studs, never just drywall anchors for screens over 40 inches.
Cable management makes or break this look. Running wires inside the wall requires cutting access holes top and bottom, threading low-voltage cables (HDMI, coax) separately from power, and patching with drywall compound. This is cosmetic work, not structural, so no permit is typically needed. But if routing electrical outlets, hire a licensed electrician or pull a permit yourself, NEC codes mandate proper boxes and grounding.
For a floating media console below the TV, use heavy-duty floating shelf brackets (steel, rated for 50+ lbs) anchored into at least two studs. These shelves sit 8 to 12 inches below the screen and hold streaming boxes, soundbars, or decorative objects. Keep depth to 10 to 12 inches to avoid visual bulk. Pair with a monochromatic color palette to maintain the minimalist aesthetic.
Skip the temptation to use adhesive cable raceways on a feature wall, they yellow over time and leave residue. In-wall routing or a single, neatly painted conduit looks sharper and lasts longer.
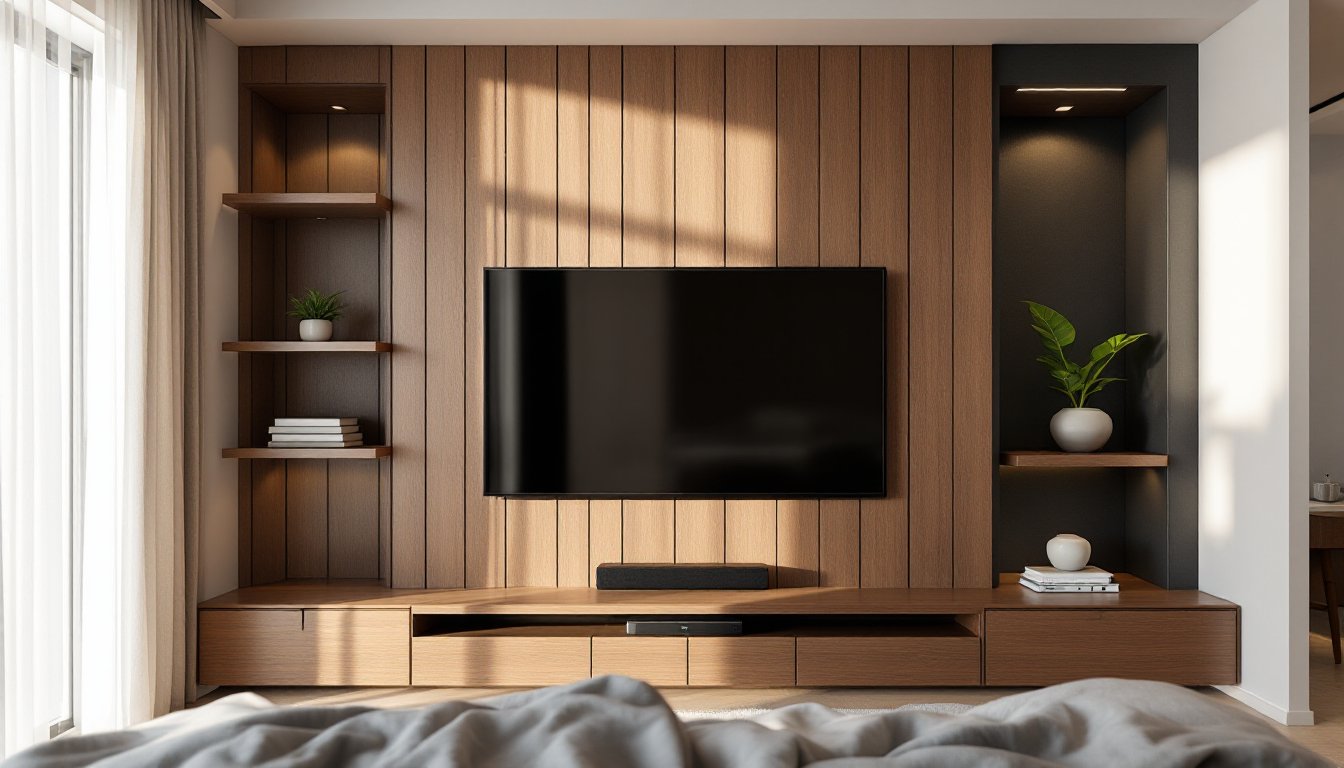
Built-In Entertainment Centers for Seamless Integration
Built-ins transform the TV into part of the wall itself. This approach suits bedrooms with alcoves, chimney breasts, or enough square footage to dedicate 8 to 10 feet of linear space.
Framing a built-in starts with 2×4 studs on 16-inch centers if building from scratch, or furring strips if adding shallow cabinetry over existing drywall. Most bedroom built-ins run 12 to 18 inches deep, enough for components but not so deep they eat floor space. Use cabinet-grade plywood (3/4-inch) for shelves and face frames: MDF works for painted finishes but swells if humidity spikes.
Plan the TV opening with at least 2 inches clearance on all sides for ventilation and future screen upgrades. Adjustable shelving above and below handles remotes, books, or décor. Wire access holes drilled through the back panel keep everything tidy.
Finish with face-frame trim to hide raw edges, then prime and paint to match the wall color for a seamless look, or use contrasting paint to frame the TV as intentional. If adding doors, soft-close hinges prevent slamming in a quiet bedroom. This is a weekend project for confident DIYers, but consider a carpenter if cutting precise joinery feels beyond your skill level.
Accent Wall Treatments Behind Your TV
An accent wall adds texture and depth without construction. Popular treatments include wood slat paneling, peel-and-stick 3D tiles, shiplap, and textured wallpaper.
Wood slat walls use 1×2 or 1×3 furring strips spaced 2 to 4 inches apart, mounted vertically or horizontally over a painted or stained backer board. Secure slats with finishing nails and construction adhesive: a pneumatic brad nailer speeds the job and leaves tiny holes. Pre-finishing slats before installation saves time and reduces mess.
Shiplap (real or MDF) installs horizontally with a nickel or spacer maintaining consistent gaps. Start from the bottom and work up, checking level every few rows. Mention this treatment often appears in design inspiration galleries for good reason, it’s approachable for beginners and hides minor wall imperfections.
Peel-and-stick 3D tiles (foam, PVC, or composite) apply directly over smooth drywall. These work if the wall is plumb and the TV mount is already installed, tiles install around the bracket. Budget materials run $1 to $3 per square foot: higher-end options with realistic stone or wood grain textures cost more but photograph better.
Avoid glossy or highly reflective finishes directly behind the screen, they create glare. Matte or satin sheens work best. And if using wallpaper, prep the wall with primer and smooth any texture: peel-and-stick varieties remove cleanly, but traditional paste-the-wall types may damage drywall if removed improperly.
Creative Shelving and Storage Solutions
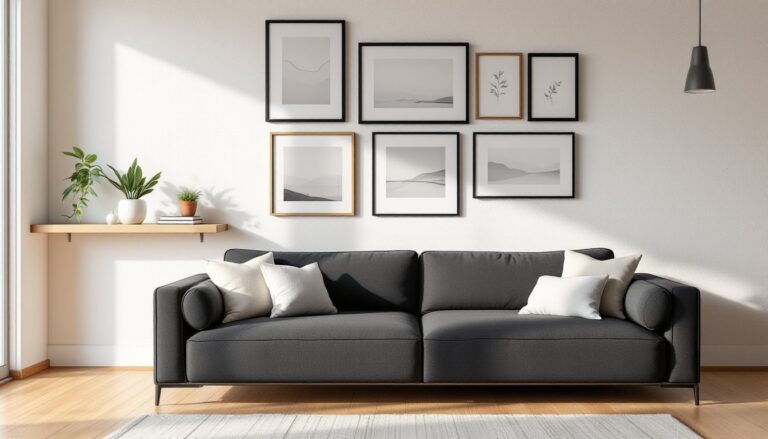
Asymmetrical shelving around the TV breaks the grid and adds personality. Instead of matching units on both sides, try floating shelves on one side only, paired with a tall narrow cabinet or plant stand on the other.
Cube shelving frames the TV without custom carpentry. Modular units install with wall anchors or interlock for freestanding arrangements. Keep the TV opening slightly off-center if the room layout allows, it feels more organic than rigid symmetry.
For tight bedrooms, consider a sliding barn door or panel system that conceals the TV when not in use. This requires a barn door hardware kit (track, rollers, and stops) mounted into blocking or directly into studs. The door should overlap the TV by at least 3 inches on all sides. Use 1-inch-thick material to prevent warping: solid core or plywood with veneer works well.
Ladder shelves lean against the wall and require no mounting, making them renter-friendly. Position the TV on a low console and flank with ladder units holding books, plants, or baskets. These setups adapt easily and move without patching holes.
Integrate ideas for decorating a bedroom by mixing functional storage with decorative objects, stack books horizontally, add small framed art, or use woven baskets to hide clutter. The goal is controlled variety, not chaos.
Lighting Ideas to Enhance Your TV Wall
Bias lighting, LED strips mounted behind the TV, reduces eye strain and adds ambiance. Use color-temperature-adjustable LEDs (2700K to 5000K) so lighting can shift from warm white for evening viewing to cooler tones for daytime.
Install LED strips along the back perimeter of the TV, not the wall. Adhesive-backed strips stick directly to the TV casing: power them via USB from the TV itself or a nearby outlet. Keep brightness around 10 to 20 percent of the screen’s output to avoid overpowering the picture.
Recessed lighting or picture lights mounted above the TV highlight the wall treatment without glare. Picture lights work best with textured walls (wood slats, shiplap, stone veneer) where the angled wash accentuates depth. Aim lights at the wall, not the screen.
For built-ins, add under-shelf LED puck lights or strip lighting inside cabinets. Low-voltage systems are DIY-friendly: line-voltage installations should involve an electrician if you’re unfamiliar with electrical codes.
Dimmer switches (standard rotary or smart dimmers compatible with LED loads) let occupants adjust lighting for different moods. Install them on the same circuit as other bedroom lighting for consistency. Many modern home decor trends embrace layered lighting for exactly this reason.
Safety note: Always wear safety glasses when drilling into walls or ceilings, drywall dust and debris are unavoidable. Use a stud finder to locate framing before driving screws for mounts or lighting fixtures.
Conclusion
A thoughtfully designed TV wall does more than hold a screen, it organizes space, hides clutter, and adds architectural interest to a room that often lacks it. Whether opting for floating minimalism, built-in cabinetry, or textured accent walls, the key is planning around viewing height, cable management, and storage needs before the first screw goes in. Most of these projects suit confident DIYers with basic carpentry and finishing skills, though electrical work and complex joinery may justify calling in help.